Showing posts with label Keeping Christmas. Show all posts

Wednesday, November 25, 2020

Keeping Christmas {I'm Dreaming of a White Christmas}


Welcome to the last Keeping Christmas post of the year! Actually, it is with a heavy heart that I announce that it will be the last Keeping Christmas post period. When I began this series YEARS ago, it was at a time when I wasn't on as many design teams with as many commitments. Now, I make a lot of Christmas themed projects for each of the different teams, so my need isn't as great. I feel so sad letting this go, and maybe I'll bring it back in the future, but for now, I'm saying goodbye! Thank you to those of you who have been so supportive of it over the years...it means more than you will ever know! Love and hugs to you all! 
I have one last card to share with you today, but don't forget to head to the other designers' blogs to see their fabulous inspiration as we are heading into the homestretch to Christmas!


My card for today uses some of the new, yet-t0-be released stamps/dies from The Greetery! The new items will be available for purchase on Friday at 10 am ET. I will link any older products that I have used on today's card to eliminate confusion on the new vs. the old! A fun announcement in the graphic below! Wahoo!

To begin this snowy design, I cut a piece of blue cardstock to fit just inside the Postal Frames Die. I used the beautiful Frosty Flakes Stencil and some Nuvo Moonstone Glimmer Paste to create the sparkly background. I set it aside to dry while I created the other design elements.

I explained in yesterday's POST how I put the dream catcher together and I used the same steps for this one. I added it to a die cut circle that has been embossed using one of the fun sentiments included in the Catching Snowflakes stamp set.

I also added some of the snowflakes from the Frosty Corners dies to add to the center of the dream catcher as well as the stenciled panel. I added a simple bough of greenery from the Hoop and Wreath stamp set with a snowflake for an accent.

I layered the entire blue panel onto the Postal Frame and then added that to a top folding A2 card base using foam squares for dimension. I added sequins and a sprinkling of glitter for a snowy feel.

I created a coordinating envelope using the Flappable Stencils that were released last year. It is such a fun and easy way to give your card that little something extra, don't you think?

The pens that I have been using in my photos for today's post and my other Winter Wanderer release projects are being released and sold on Friday as well, so you'll want to check those out! 

I kept things clean and natural for the fiber elements of this card to really give it a snowy feel, but you could play around with ink blending on the fringe and the dream catcher to create some colorful accents!

Well friends, this wraps up my final Keeping Christmas post, which makes me sad! Don't fret though, because I'll be sharing Christmas inspiration with each of the design teams I am a part of! Thanks SO MUCH for fluttering by!


Sunday, October 25, 2020

Keeping Christmas {Joy}


I can't believe it's already the 25th of October! Welcome to this month's installment of the Keeping Christmas Blog Hop! Christmas is two months away, can you believe it? I can't! I'm getting super excited, though! I love getting the house all decorated for Christmas with all of the bright, festive colors and yummy smells! 
I was a guest this week on the Papertrey Ink "Live around 5" and I showed how to make these two cards! I was asked if they would be on my blog, so I decided to just share them here for my Keeping Christmas project for the month! Also, I have the other project I made as well, which is NOT Christmas, but I promised to share it here, so it is at the bottom of today's post! Also, don't forget to hop to the other designers' blogs to see what festive inspiration they have for us today!


So....the card I made DURING the Live at 5 is the one on the left and my sample that I had previously made and shared at the end is on the right. I mentioned that I liked the one with the pink on pink background better, but now I think I like the one with the black better! LOL! 

I'll start with the one I made live and then I'll share the differences between the two as I go along! To begin both cards, I die cut the Border Basics: Rectangle Die out of white cardstock and Pure Poppy cardstock. I used the Border Bling: Joy Frame Die to add the extra detail to the red frame.

I stamped the Holiday Spirit  background onto Pale Peony cardstock using Pale Peony ink. I layered the frame over the top using a tape runner. Once that was done, I added the evergreen boughs which are from the Tree Essentials stamp set. I die cut them from Olive Twist cardstock and then stamped the images using Pinefeather ink. I think they look very realistic stamped like this! I love how they turned out!

I placed them in the two corners using foam squares for dimension. Once they were in place, I added the stamped ornaments from the fabulous Ornament Greetings stamp set which are stamped in Pale Peony, Pure Poppy, and Scarlet Jewel ink.

I couldn't resist adding some extra holiday charm with the holly berries and leaves from the Corner It: Holly stamp set. They add just the right touch, don't you think! I stamped the leaves in Spring Moss with some added shading using a finger dauber and Simply Chartreuse ink. The veins are stamped using Ripe Avocado ink for even more contrast.

The "JOY" word is die cut twice from white cardstock and once from gold paper. I glued them together using liquid glue with a precision tip. I really wanted to create the illusion of the word floating above the foliage and frame. This was achieved by only inking up the portion of the word that touch the greenery. I showed on the Live how sturdy this is, even though it seems like it wouldn't be!

This is the card I made to show as my sample and it has an extra holly leaf at the top as well as the background being stamped in black rather than Pale Peony ink.

I thought that perhaps the black might be too visually distracting, but I think I like the contrast that it adds. How about you? Which one do you like more?

This one has white paint splatter as well, which gives the design some snowy detail. 

Of course some glitter and sequins finish off both designs!

This was the fall project that I shared on the Live. I love using non-traditional colors for pumpkins for something a little bit unexpected.  I used the Tent Style Packaging Die paired with the Hello Pumpkin stamp set to create this fun little gift presentation. 

I used velcro dots to secure the package for ease. I love using dots like this to secure packages like this!

I also created a more traditional one using traditional fall colors. This one has a sprinkling of glitter as well. I had a lot of fun doing the Live, even though I was nervous! ha ha! Thanks for fluttering by!


Friday, September 25, 2020

Keeping Christmas {It's the MOST wonderful time of the year!}


Hello and welcome! It's the 25th and that means that it's time for the Keeping Christmas Blog Hop! Christmas is exactly 3 months away and the countdown is on! I have two different projects to share with you today. Up first is a set of vintage Santa tags using a new Santa stamp that I got from Amazon this week! Before I dive into the details, here are the links to the other designers' blogs! I can't wait to see what they've been up to!

Kelly Lunceford (Creator)


It is from the Deep Red stamp company and I just love how nicely it fits onto these large tags! You can see it HERE. It is quite a large image, but I chose to just use a portion of it on today's tags. 

I die cut three of the Basic Bookmark 3 die out of white cardstock and then stamped the Santa image in Pure Poppy ink. The bottom portion of the tag is die cut using the same die, but this time out of pattern paper, making sure to line it up with the sentiments I wanted to use.

I added a strip of black cardstock where the image and the pattern paper meet. I rummaged around in my Christmas embellishment collection to unearth these fabulous glittery stars!

I added them to the tags using hot glue as well as the holly sprigs that I use so much! I quickly perused the Christmas section at Hobby Lobby the other day and didn't see that they had these in stock yet! I sure hope they carry them again this year...they are one of my favorite go-to embellishments for Christmas crafting!

My next project uses scraps left over from last month's Keeping Christmas post. I have quite a few left over and I thought I'd put them to good use by making some little favor boxes using the Favor It Box 4 die collection.

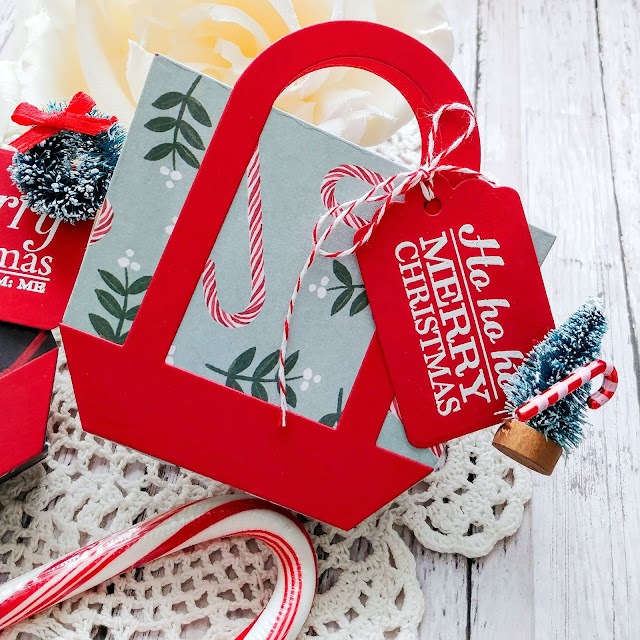
I also used the Scalloped Tag Collection for the tags all decked out with trees, candycanes, wreaths, snowflakes and gingerbread boys!

I made 5 of these in total, but really could have kept going with all of the scraps I have! I'm planning on using these to fill with a little lotion, lip balm, and sweet treats....most likely a vintage foil wrapped Santa! I think he would be so cute peeking out of the top!

I tied the tags up with some Pure Poppy Baker's Twine and then added the tags using foam squares. I felt this was much easier than trying to tie the twine around the handle of the bag. This ensures that the tag will lay exactly how I want it! LOL!

The sentiments are heat embossed in white onto the tags using Ranger's White Detail embossing powder. This my favorite white powder!


I'm excited to add these to my stash of Christmas creations! This is the time of year where I take inventory of what all I have. Once that is done, I can see which areas need a little bit more attention! I've been a cardmaking machine these last few months with all of my design team commitments, so I think I'm set on cards! Tags are always my favorite! Thanks for fluttering by!


Tuesday, August 25, 2020

Keeping Christmas {Holiday Pocket Journal}


Welcome to the August Keeping Christmas Blog Hop! I can't believe how quickly Christmas will be here! Eep! With that in mind, I chose to make 6 Christmas pocket journals/calendars to give as gifts to keep track of holiday planning! Even though I prepped 150 of THESE and thought I'd never want to see one again {LOL!}, I decided that they'd be super fun to make all dressed up in Christmas paper and charms! Before I dive into the details, here is the list of the other Keeping Christmas designers. I can't wait to see what they have created!

The paper collection that I used for the entire project is called Midnight Noel and I found it at Hobby Lobby in the Christmas sticker/embellishment section. I always love when July rolls around and the Christmas crafting section makes a come-back!

I bought the charms from Amazon and they came in a pack of about 100 or so for not much money. If you just search for "Christmas charms", a ton of options are available. I used lobster clasps to attach a spiral jump ring and then the charm which makes it a cinch to add to the elastic. 

I wanted to include a pocket planner in each of the journals. I bought these from Amazon as well and they are a two year journal so you can use it for next year as well! I can usually find things like this at the Dollar Tree, but I sent my husband and he came home with huge spiral bound student planners! LOL! I gave those to my kids to keep track of all of their remote learning things, like Zoom meeting codes, etc. Spring was a learning curve for all of that and now I feel a little more prepared!
But....back to the journals. I measured the planner size to decide how big to make the laminated journal covers. I was hoping to find something 6 inches or smaller so I could get two covers from one sheet of 12 by 12 paper, but these pocket planners were just slightly larger.

The pocket planners came with a floral cover, but were also inserted into a plastic protective sleeve. I decided to cut some coordinating pattern paper to slip inside to keep the journals cohesive and festive.

The other two sections are just like what are inside of THESE and I used coordinating paper for those as well.

I thought these might be fun hostess gifts to give at Thanksgiving, but most people start their holiday planning and shopping long before that. Maybe Halloween gifts? LOL! I'm not sure when I will gift these!

I was thrilled to find the perfect Candy Cane charm in the pack that I bought. It goes perfectly with this sweet pattern paper! The elastic that I use it also from Amazon and comes in a roll of 100 yards and is very economical. If you search for "Cord Elastic" you will find a lot of different choices!

Here's a few more of the pretty charms. I just love how nicely the snowflake looks on the journal on the left side...a perfect match!

I made one for myself, so I can't wait to put it to use organizing and planning all of my holiday purchases and dates to remember. I'm guessing there won't be nearly the amount of "places to go" this year, which is sad. I think navigating the holidays will be difficult for all of us this year! "I'll be home for Christmas....you can plan on me!" LOL!  I think it will help us all cherish our traditions and loved ones a little bit more! Thanks for fluttering by!


Saturday, July 25, 2020

Keeping Christmas {Santa Mail} + GIVEAWAY


It's the most wonderful time of the month! It's always fun when the 25th of the month rolls around and I get a chance to feel the spirit of Christmas for a day or two! Thank you for joining me and the rest of the Keeping Christmas team as we share some fresh inspiration for you to get a head start on your Christmas preparations!
I'm also doing a fun GIVEAWAY for Christmas in July!!! This giveaway is for U.S.  residents only! I will be giving away a $50.00 gift certificate to The Greetery and a brand-new, never been opened Downton Abbey movie! Every year after Christmas I re-watch the entire series, so I thought it would be fun to add this into the giveaway! I will be picking a random winner from the comments left on this post! I will leave the comments open until Tuesday, July 28th at 12 noon MDT! 

Make sure you hop along to the other designers' blogs to see what fabulous inspiration they have in store for you today!

Kelly Lunceford (Creator)
 Claire Broadwater (off this month)
 Nance Salkeld (off this month)


It's no secret that I love a postal theme, and a Christmas postal theme is the cherry on top! I've shared a few Christmas postal ideas already this year, so these go nicely with what I've already made! My mind has been turning with different ways to use the new Create-a-Crate die and I thought it would be fun to make a Christmas crate! 
These are perfect to tuck some holiday treats, maybe a little jar of jam, the list goes on and on! I really wanted to explore stamping on these muslin bags and the idea to make them "Santa Mail" bags popped into my mind! One of my all-time favorite stamp sets is  Santa Stationery and I knew the images would stamp nicely onto the little bags!

I chose a few different images from the set and added them using black and Pure Poppy ink. I did free hand, but you could try putting a piece of cardstock down inside the bags and use a stamp positioner to make sure you got it just right!

I filled the bags up with some Hershey's Nuggets for photography purposes, but you could fill them up with all kinds of things. This 3 by 4 size would be perfect to hold a gift card as well. You could put the gift card in the muslin bag and then add some treats inside the crate. My plan definitely includes some vintage foil wrapped Santas! 

I absolutely LOVE the muslin bags from Papertrey Ink. I used one of those on THIS project (scroll down) but bought some from Amazon for today's project. I would DEFINITELY recommend the ones from Papetrey Ink. These are more flimsy and see-through, which I DON'T like! Oh well....you live and learn!

Once I had the candy inside the bag, I cinched it up and tied the remaining cord into a bow! You could also add a little tag to the cord as well for added detail!

I die cut all of the pieces for the crates and then used the included woodgrain embossing panel to give each crate that realistic look! Also, I found that if I didn't push out the paper that is left in the holes in each of the four corners as I was doing the die cutting, it will leave the circles intact. This eliminates the need to use brads or any other type of embellishment. I was making multiples and I don't have enough mini brads on hand!

I ended up by making three crates and three stamped muslin bags in total! I love having little gifts like this on hand when it comes time to put together my gift ensembles!

I adorned the front of each crate with the beautiful branch from the Winter Sketches Stamp Set. I also used the Santa stamp from the Santa Stationery stamp set, but die cut it using the Pretty Postmarks dies. I used those same dies for the other postal elements for the front. The Special Delivery and wavy postal lines are from the Pretty Postmarks stamp set

The Create-a-Crate die collection comes with the frame portion to add to the end of the crate. I used one of the other sprigs of berries and greenery to adorn this particular end. The sentiment is from the Sentiment Suite: Christmas stamp set and is stamped in black and then I added the die cut frame portion around it using liquid glue.

The other side of each of the crates has another sentiment from the same set paired with the pine cone image from the Winter Sketched stamp set. It adds just the right amount of extra detail that I love!

You could also do a chalkboard look like I did on my peach crate during the release! I just really love the light and airy look of these side panels for this project!

I added some paper shred to the inside of each crate to give it some added detail and charm. It also helps secure whatever it is that you are putting inside the crate. 

Here is the final product all ready to go, minus all of the holiday treats and sweets that will be added when Christmas rolls around! This was a fun project to work on and I can't wait to make more crates for other occasions!

Don't forget to leave a comment for a chance to win my GIVEAWAY!! Thanks for fluttering by!