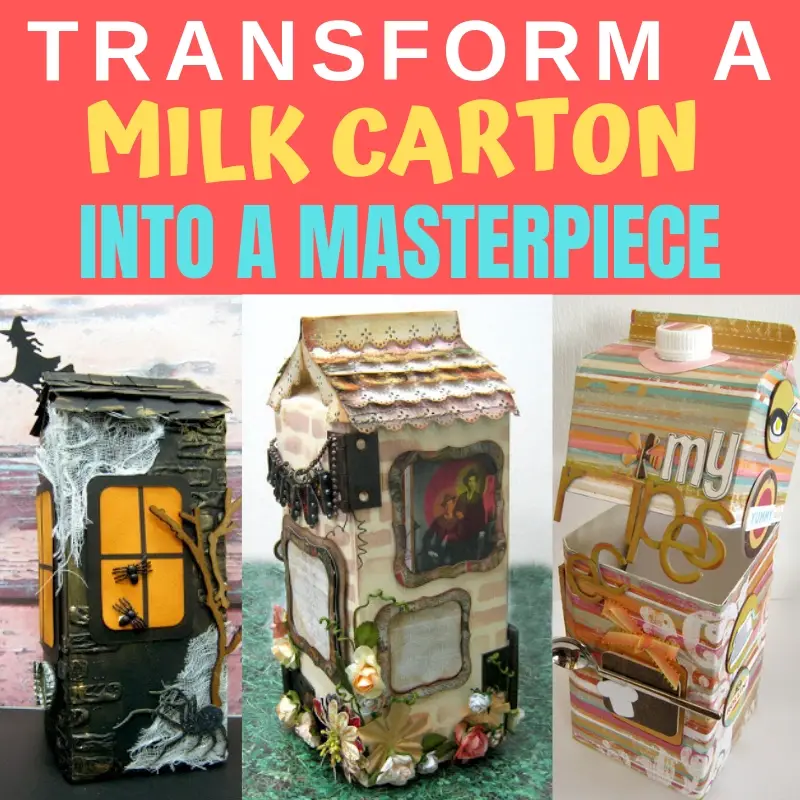
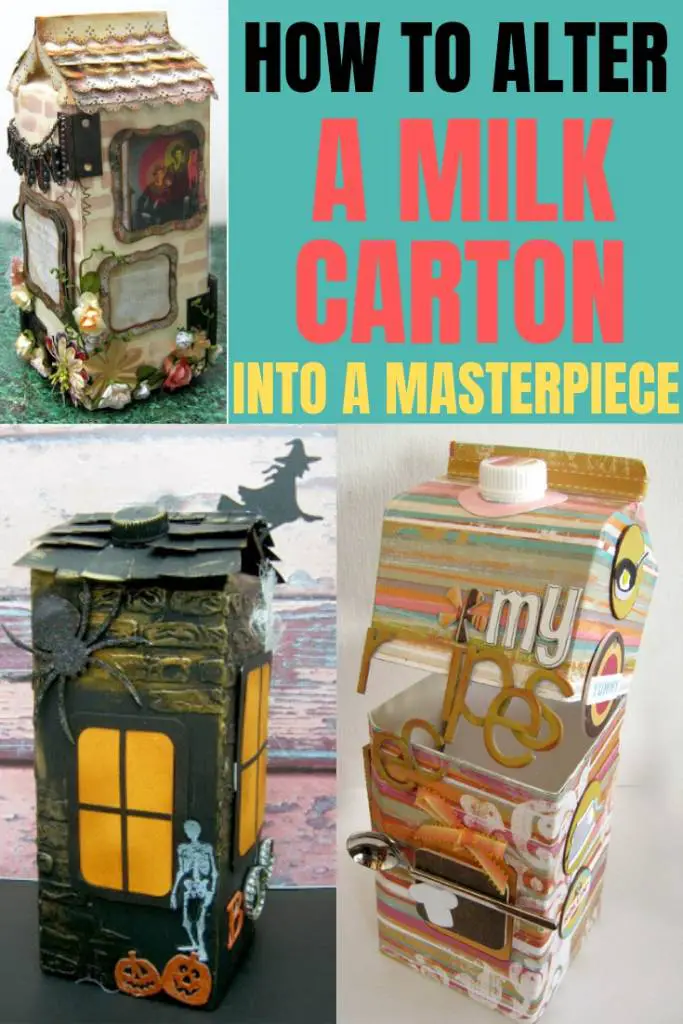
Inside: how to alter a milk carton into a masterpiece instead of throwing it away
I don't know how the four of us can generate so much trash. I try to minimize our amount of trash but somehow it keeps mounting. So I wanted to come up with ways to recycle or up-cycle some of the things we usually throw away and I came up with a few ways to make a masterpiece out of a milk or juice carton.
ALTER A MILK CARTON
Instead of throwing away your milk or juice cartons you can use it as a base for an altered craft project. A carton like this is good for recycling or altering because:
- It has thick walls that can "carry" mediums, paint and paper without wrinkling or degrading.
- The carton has the perfect square shape and even sides to add embellishments,photos or other 3D items.
- Its shape resembles a shape of a house with a triangle roof on top.
- It has a flat base so it can stand on its own as a 3D project.
- You can easily clean it and prep it for any material or medium.
- There's always one in the fridge or on its way to the trash.
HOW TO PREP A MILK CARTON FOR ALTERING
Before you start your project you need to thoroughly clean the milk carton because any residue of milk remaining inside might rot and start to smell or become moldy and you don't want that.
- First open the carton and discard of any liquid that is left inside.
- Then rinse it with hot water a few times.
- make sure to rinse the cap as well.
- The next step is to wash the inside of the carton with soap or bleach. Pour a little amount into the carton and shake well. Then rinse with plenty of water.
- Wait until the inside is completely dry before closing the cap.

WHAT CAN YOU MAKE OUT OF A MILK CARTON
The first thing you need to do is decide what type of project you want to make. The carton's shape is suitable for many craft projects like:
- Photo display
- Boxes of any type
- Decorative home decor pieces
- Combination of some or all of the above
HOW TO ALTER A MILK CARTON
STEP 1: PRIME
Milk cartons are made of paper so they need to be primed for any material you want to put on them even if it's paper. There is a protective layer on the inside of the carton so you don't need to worry about the inside only the outside.
Do this:
- Remove any price stickers or other things that are on the carton.
- Cover all the parts of the carton with two coats of gesso waiting for each layer to dry before adding the next one. You can use any color of gesso or consistency you have.
STEP 2: COVER
The next step is to cover the milk carton with a material of your choice: paint, paper, modeling paste, vinyl etc. Each of the mentioned materials require different tools or process.
PAINT
In order to cover the carton with paint you need to:
- Pick the right paint for your project.
- Apply two coats of acrylic paint.
- Let dry completely
COVER WITH PAPER
Since the shape of the carton is not a perfect square covering it with one piece of paper will be impossible so you'll need to cover it with pieces of paper.
Here's how:
- Measure the sides of the carton and cut pieces of paper according to that size. Measure only one side since they are equal.
- You can cover the corners of the carton with washi tape or paint them to create a frame for the paper pieces. You can have the pieces of paper extend all the way to the corner but make sure to glue them properly so the paper will not lift.
- Attach the paper pieces to the sides of milk carton.
- Measure the top parts of the carton and cover them with paper as well.
- Seal the paper with Mod Podge or gel medium.
MODELING PASTE
If you want to add texture to your project you can add modeling paste with stencils.
Do this:
- Place the milk carton the the side and apply modeling paste with a stencil.
- Dry with a heat tool or let dry in the air before repeating the process on other sides.
- Add texture to other sides as well.
- Make sure to add the texture in a way that flows and continues over all sides so it'll look consistent.
VINYL
Covering the milk carton with vinyl, felt, fabric or any other material is similar to the process you did with paper. Apply the right glue to the back of the material and attach to the carton.
STEP 3: EMBELLISH
This is the step where your altered milk carton takes shape. Here are a few ideas:
- Make the milk carton into a photo display by adding photo frames on all sides and insert photos into them.
- Give your carton a house look by adding windows, roof and a little flower garden.
- Embellish with flowers and vines starting from the bottom to give it a more realistic look.
- Add a string of little banners or flags hanged from one side of the milk carton to the other.
- "Build" a roof by adding small paper roofing tiles attached with foam tape for extra dimension.
- Cut the carton horizontally on three sides to create a box.
MILK CARTON PROJECT IDEAS
SPOOKY HALLOWEEN HOUSE
Transform a milk carton into a Halloween home decor piece or photo display complete with spooky creatures, a witch and skeleton.
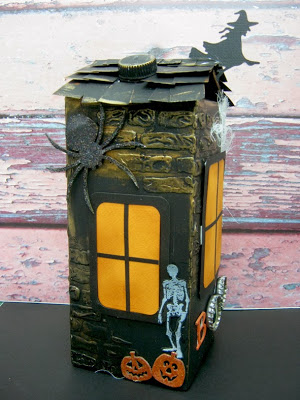
Check out how on this video tutorial
HOUSE PHOTO DISPLAY
Alter a juice or milk carton into a house shape photo display with a tile roof and windows.
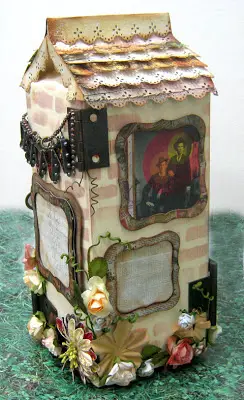
Follow the step by step photo tutorial to make it
RECIPE BOX
Turn a milk carton into a recipe box with a little cork bulletin board on the back.
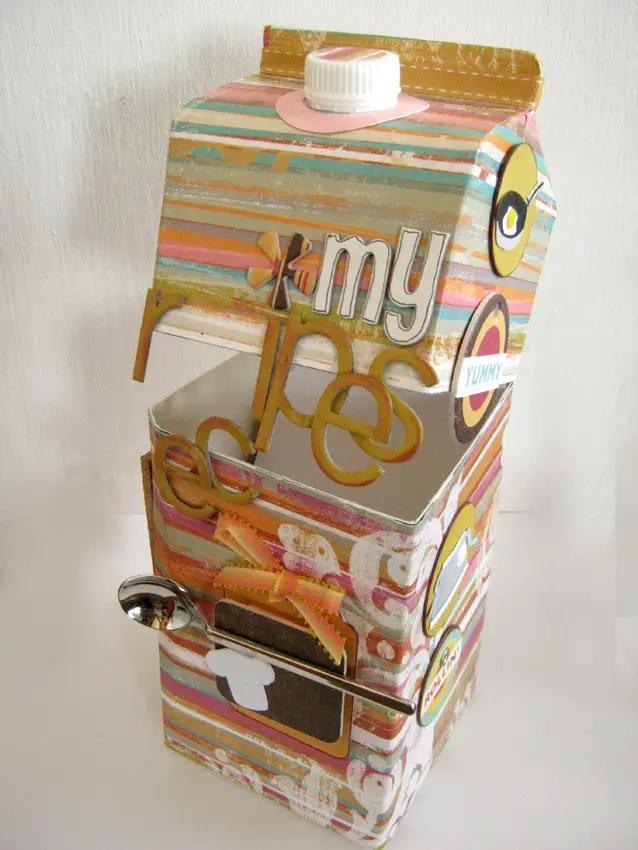
Find the step by step tutorial here
The fun part about altering milk or juice cartons is that they are always available and they come in different sizes so you can make your projects in any size you want and as many times as you want!
SAVE it for later - PIN IT!
Have fun creating!