

Introduction: Red Copper Ring


In this instructable, I will show you how to make this super bright red copper ring. It is really easy, really cheap and can be completely customized by you, so let's get started.
You will need:
Materials
Copper sheet - The thicker the better, I used 1.2mm thick copper.
Paste flux - Mine is made for jewellery, but you could use some plumbing flux instead.
Silver solder - Again, can be bought from a plumbing supply store.
Polishing compounds - I used jeweler's rouge but you can use an automotive polish.
Pickle - You can make your own with vinegar and salt.
Tools
Soft mallet
Pliers
Hammer
Jeweler's saw or hacksaw
Fine file or sandpaper
Rotary tool or elbow grease
Ring mandrel or appropriate cylinder
Step 1: Cut the Sheet Into Three Strips.


The three strips were cut out with a jeweler's saw will be soldered together to make a thick, chunky ring shank.
The formula for how long these strips should be is:
(Diameter of your finger + Thickness of material) x pi
I wanted a size 10 ring, which is about 20mm in diameter, so in my case this formula was:
(20mm + 3.6mm) x 3.14 = 74.1mm long strips
Step 2: Prepare Shanks for Sweat Soldering.


Sand the copper
Apply flux
Add generous amount of solder
Heat up copper to melt solder
Then pickle the copper to remove the oxides, you can use a mix of vinegar and salt to do this.
After the copper is clean, stack them up and solder them on top of eachother.
Step 3: Form Ring and Solder Seam.


File the rough edges smooth.
Bend the ring shank around with pliers and hold it closed with some scrap binding wire.
Solder the ring shank with plenty of solder.
Step 4: Hammer Ring Blank Round.


Using a cylinder and a soft mallet, beat the ring into a round shape.
I used a ring mandrel, but you could use a large drill bit, a socket set or anything round you can get your hands on.
If your ring turned out too small like mine did, it can be enlarged by hitting it with a metal hammer around the circumference until it is the appropriate diameter.
Step 5: File the Ring Blank Over.


Get the basic shape of the ring in with a file and some elbow grease.
This step is open to your imagination, I just went with a classic domed look.
Step 6: Sand, File and Sand the Inside of the Ring.


Using a rotary tool and a needle file, round over the edges of the ring to make sure it is comfortable.
I taped some sandpaper from 400 grit to 600 to 1200 onto a drill bit to sand the inside.
Step 7: File Some Texture Into Your Ring.


I chose to file facets on my ring, but you could use a hammer to beat some interesting texture into it or even file grooves and troughs into it.
My process was to clamp the ring, file a facet, run over the facet with sandpaper, unclamp, rotate and repeat. This took a long time.
Step 8: Polish the Entire Ring.


I used cotton buffs in my rotary tool for the inside, and larger felt buffs attached to an old wood lathe for the outside of the ring.
I pre-polished with green crocus and final polished with red rouge polishing compound, but you could also use some abrasive automotive polish.
Step 9: Heat Treat the Ring.


To get this particular texture and colour, I covered the entire ring with flux, heated it up to a bright red, then quickly quenched it in a bowl of water. This has to be done quickly for the best results.
Step 10: Polish the Ring Again and Done!


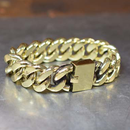
I just went over the ring with my final polish, red rouge, and buffed it with a rag to end up with this.
The red is super bright and truly eye catching in the sun light. Depending on how you heat treat it you can get colours from deep purple to bright yellow!
To preserve your finish, rub some wax or a sealer onto the ring. I used renaissance wax. This prevents the colour from chipping off or darkening as well as prevents the copper from turning your skin green.

Fourth Prize in the
Homemade Gifts Contest 2015

Second Prize in the
Jewelry Contest


