


If your workshop is stocked with anything, at the very least you probably have some combination of flat stock. By stacking multiple layers of flat materials, often in different thicknesses, you can make all manner of things. It’s only a matter of identifying the different layers needed and getting started.
Caution: In this tutorial we’ll be using medium-density fiberboard, or MDF. The adhesive used to bind MDF together contains formaldehyde and all sorts of other carcinogenic compounds. Wear a respirator and work in a well-ventilated area.
Now, for an example of how this process can be applied to something rather impressive, take a look at the as-yet-unnamed warrior woman in Figure 1-14 above.
To give her weapon the right sense of thickness, the blade will be made out of two layers of ¾” (about 19mm) MDF. The whole process begins with drawing out the profile of half of the double-headed blade onto a piece of MDF, as shown in Figure 1-15.

Then, using a jigsaw, cut out four copies of this profile (Figure 1-16).

Since the whole head of the axe will have to fit onto a shaft of some sort, the blade halves should be notched in order to fit cross pieces to tie them all together. The four matching cross pieces can be seen in Figure 1-17.


At this point, the two halves of each side of the blade need to be glued together. In order to keep everything from shifting around while the glue dries, clamp them together with spring clamps, or simply screw them together with some drywall screws.
Once the glue is completely dry, it’s time to put an edge on the blade. This can be done by grinding it off with a coarse file, whittling it down with a sharp knife, sanding it off with a belt sander or flap-wheel grinder, or simply clamping the work piece to the edge of the bench and shaping the edge with a jack plane (Figure 1-18). It’s really just a question of the tools you have at your disposal.

Once the rough shape of the two blades has been made, the edge can be shaped a little more with some 80-grit sandpaper on a sanding block (Figure 1-19).

At this point, the blades are about the right shape, as shown in Figure 1-20.

Unfortunately, they’re still a little on the heavy side. This can be mitigated by cutting big chunks out of the middle of the blade with a hole saw, as shown in Figure 1-21. Just like in aircraft or ship construction, these interior holes (called lightening holes) will reduce the weight of the finished piece without compromising the strength.

No hole saw? Drilling a couple of starting holes will make it possible to cut big chunks out of the middle of the blade with a jigsaw.
The important thing to remember is to leave enough material along the outer edges for the next layers to adhere onto the finished piece. A ½” wide (10mm) border should be more than enough.
Now that the two blade halves are shaped and the excess weight has been cut out of the middle, it’s time to put them together. For this step, they need to be placed on top of a couple of blocks that will keep them both flat and parallel (Figure 1-22). Axe blades look funny if they’re bent in the middle.

Now the cross pieces need to have holes cut into the middle in order for the handle to fit through. Then they can be slotted into the notches on the blades, as shown in Figure 1-23.

In order to make sure that the parts all stay aligned during the gluing stage, now’s a good time to take advantage of some clamps (Figure 1-24).

The bar clamps will hold the whole assembly together while the glue is applied (Figure 1-25). Since MDF has a fairly porous surface, it can be held together with a cyanoacrylate adhesive such as Zap-a-Gap, Insta-Cure, or Super Glue. If those are too expensive, carpenter’s wood glue will work just fine. It’ll just take longer to cure and form a strong bond.

While the glue is probably going to be more than adequate to hold this whole thing together, it’s always a good idea to be sure. In this case, it’s a good idea to add a couple of screws to hold the bottom and top brackets onto the blade.
One of the biggest challenges when working with MDF is avoiding splitting the material when driving screws into it. Since it’s basically just pressed wood garbage, it’s really easy to wedge the bits of sawdust apart. This makes it a really good idea to pre-drill a hole everywhere a screw will need to be inserted. Start by drilling a small hole about the same size as the shaft of the screw (the skinny parts the threads stick out of). as you can see in Figure 1-26.

Then, since nobody wants to see screw heads sticking out of the ends of the giant battle axe, a bigger bit is used to make the top of the hole a bit bigger in order for the screw head to sink into the MDF (Figure 1-27).

Finally, drive a screw into that hole, secure in the knowledge that it won’t do any more damage than absolutely necessary (Figure 1-28).

With the basic shape of the double-headed axe assembled, it’s time to add a skin and make it pretty. Remove the handle and set it aside for now. Seriously. Resist the urge to do silly things with the as-yet-unfinished axe (Figure 1-29).

Now it’s time to cover the sides of the blade with a thin layer of sheet styrene. This can be purchased from plastic suppliers in various thicknesses. For smaller projects, you can use the plastic “for sale” signs available at your local hardware store. For even smaller projects, a variety of thicknesses of styrene sheet are available at your local hobby shop.
You’re going to need a template and, in this case, a piece of butcher paper makes a good starting point. Simply hold it in place on top of the blade, and then use a crayon, pencil, or even a piece of chalk to do a rubbing. This means running the writing utensil back and forth across the piece. Everywhere there’s a hard edge will become a darker impression on the surface, as shown in Figure 1-30.

Once the outline of the blade is clearly transferred to the paper, cut it out with a pair of scissors. This will give you the template you’ll need for cutting the plastic.
With the template cut out, trace it onto the sheet plastic, as shown in Figure 1-31.

There are a few good ways to cut the shape out of the plastic sheet. The first option: use a saw such as a jigsaw, scroll saw, or band saw. If you don’t have access to any of these, run the tip of a sharp knife along the traced lines to lightly score the surface of the plastic. Once the lines are scored, you can either repeat this step a few more times until the blade cuts all the way through the sheet, or you can go back over it one more time to cut just a bit deeper into the sheet and then bend it until it snaps along the scored line (Figure 1-32). Just be careful because this method will create very sharp edges.

Repeat this step to cut out four copies of the styrene shape (Figure 1-33).

Pick any of these four pieces and fit it into place on the MDF blade without gluing it in place. Here’s where a handful of spring clamps will come in handy (Figure 1-34).

Dry-fitting the parts (assembling without glue) is a good idea. If it’s not conforming to the curve where the handle will go through the blade, the sheet can be rolled by hand in order to pre-bend it so that it will lie in place better. Once the parts fit together neatly, you can apply glue to the MDF. The whole assembly can be clamped together securely while waiting for it to dry, as shown in Figure 1-35.


Repeat the fitting, gluing, and clamping for the other side as well. Once the glue is dry, the head of the axe is nice and smooth on the outside. The edges of the plastic may need some trimming to sit flush with the edges of the MDF, but that’s a quick job for a knife. Since this is going to be a much more elaborately decorated piece with designs etched into the surface, however, it’s going to need at least one more layer.
This last layer will end up making the higher areas bordering the etched recesses. This is a good time to cut out the recesses with a knife, or a jigsaw with a very fine blade.
When the pieces are cut, it’s not uncommon for the edges to come out a bit rough. This can be readily solved with a piece of folded sand-paper. For the really tight corners, it’s a good idea to get Mister Tongue Depressor involved (Figure 1-36).

Once all of the edges are cut out, it’s simply a matter of adhering this final layer to the layer below. Start by dry-fitting to make sure everything looks right (Figure 1-37).

Before gluing on the final layer, now’s a good time to attach the handle. This way it can be pinned in place with a screw. The screw hole will be covered up by the final layer of plastic sheet (Figure 1-38).

With the beginning of the handle glued in place, it’s time to glue on the final layer of styrene. Since it may be a little tougher to get the parts to stick together, this is a good time to clamp thin strips of wood across the top of the parts to apply even pressure all the way across the work-in-progress, as shown in Figure 1-39.

Note: While the layers of styrene can be held together with the same cyanoacrylate-type adhesive that was used to get the styrene to stick to the MDF, a better option is a “solvent cement,” which you can get at hobby stores or the same supplier that sells the sheet styrene. This type of glue will chemically dissolve a bit of the styrene on the surface. Once the solvent evaporates, all that’s left behind is the solid styrene, effectively welding the two pieces together. Even better, this water-thin glue can be applied using a syringe bottle or special applicator after the parts are clamped together (Figure 1-40). A drop applied at the edge will wick its way in between the parts by way of capillary action, meaning that the parts can be bonded after dry-fitting without disassembling them to add glue.

Now that the head of the axe is assembled, there’s still a bit of filler and sanding work to do. Since MDF is basically just sawdust held together with really weak glue, it’ll be easy to nick or scratch the surface of the blade’s edge. These edges can be saturated with more cyanoacrylate glue to make them durable (Figure 1-41).

As the glue soaks in and cures, the fuzzy sanded surface of the MDF will become rough and hard. Sand it smooth again with a sanding block (Figure 1-42).

Finally, it’s a good idea to use some spot putty or body filler to fill in the edges of the blade and smooth over the seams between the various layers of MDF and styrene (Figure 1-43).

Now that the axe head is assembled and smoothed out, it’s time to dress up the handle. This is a larger diameter piece of pipe with a PVC coupler glued to one end and a cap glued to the other end.
Note: Readily available PVC or ABS pipe fittings from the hardware store can be very helpful when building things that are cylindrical. The only problem is that a lot of these pieces will be easily recognized as pipe fittings. This can be solved by cutting them down in size, carving grooves into them, or grinding down the ends to make them less recognizable (Figure 1-44).

In order to make the grip look less like an off-the-shelf piece of plastic pipe, carve a helical groove around it with a file and a sanding block (Figure 1-45).

Slide the grip assembly over the smaller handle and screw it into place (Figure 1-46).

Note: In order to keep everything from rattling around, the inner pipe can be shimmed in place by wrapping it with heavy paper or thin plastic scraps (called shims). Once the handle section is screwed in place, the gap between the inner pipe and the outer handle can be filled with a two-part epoxy putty available at most hardware stores. As an alternative, the gaps can be filled with auto body filler, casting resin, fiberglass resin, or a bunch of glue and sawdust. It’s really just a question of getting the gaps filled with anything that will stay put once it cures.
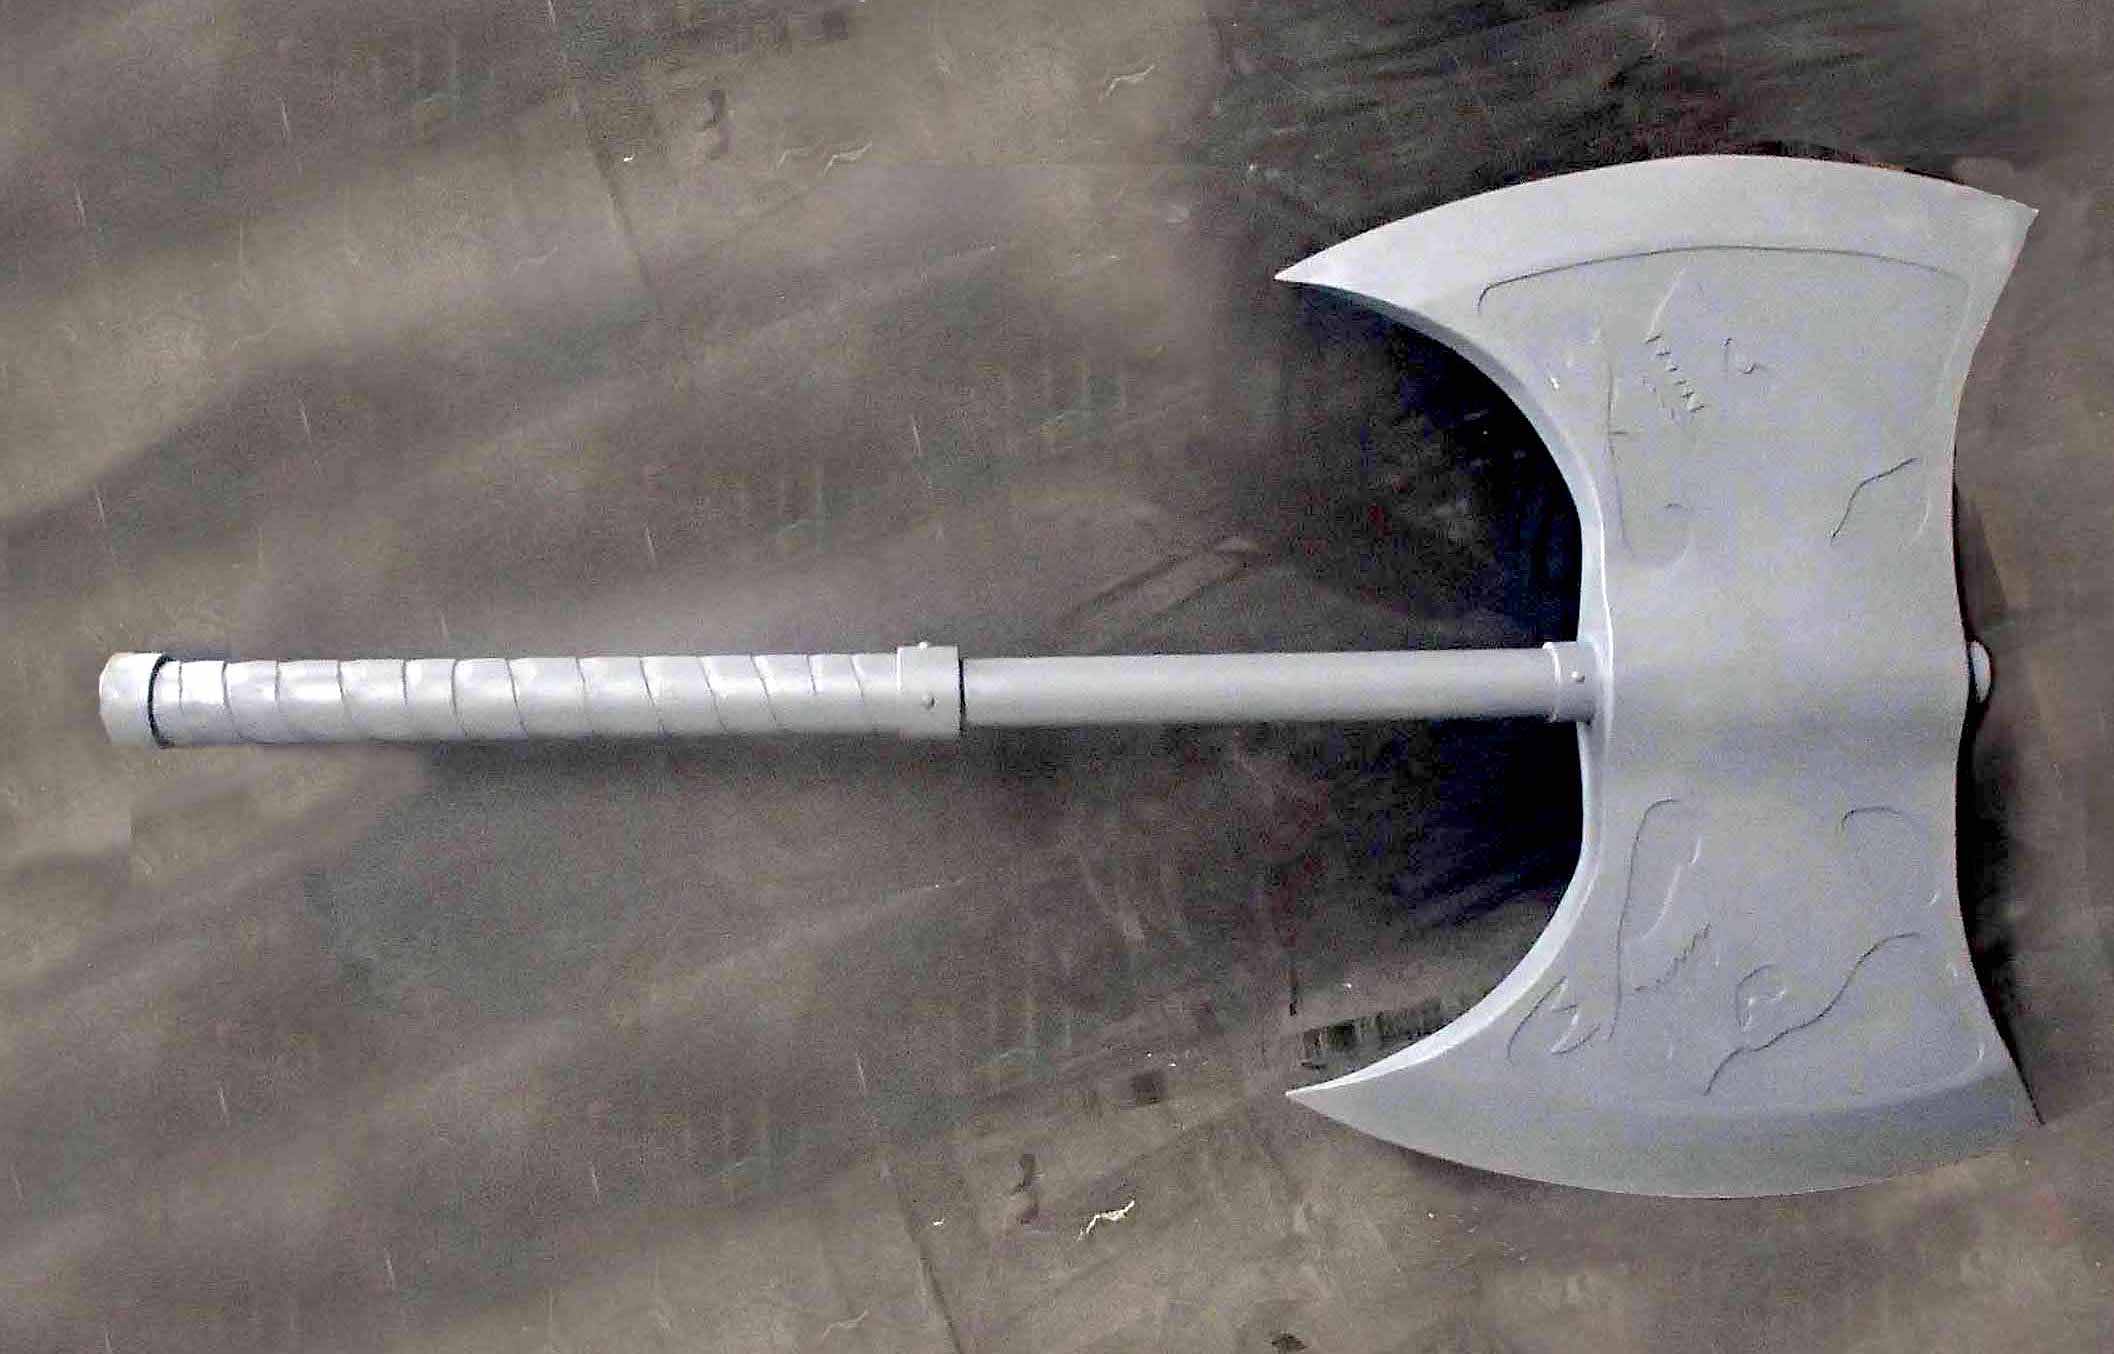
Once the pieces are glued together, the whole thing needs a coat of primer and it’s ready for paint (Figure 1-47).
A bit of paint can do wonderful things. We’ll talk about painting in Part IV of Make: Props and Costume Armor (available for pre-order now).


