Jet liveries squad 1

Gliding is the purest form of flight and I have always been mesmerized by it, but I was tired of traveling long distances to buy special materials for my gliders. I was also tired of it taking a week to build them and a minute to break them. So, I took it as my personal challenge to design a glider that required only stationery paper and minimal building time, and yet maintained excellent gliding characteristics. The result was the Speed Jet paper glider.

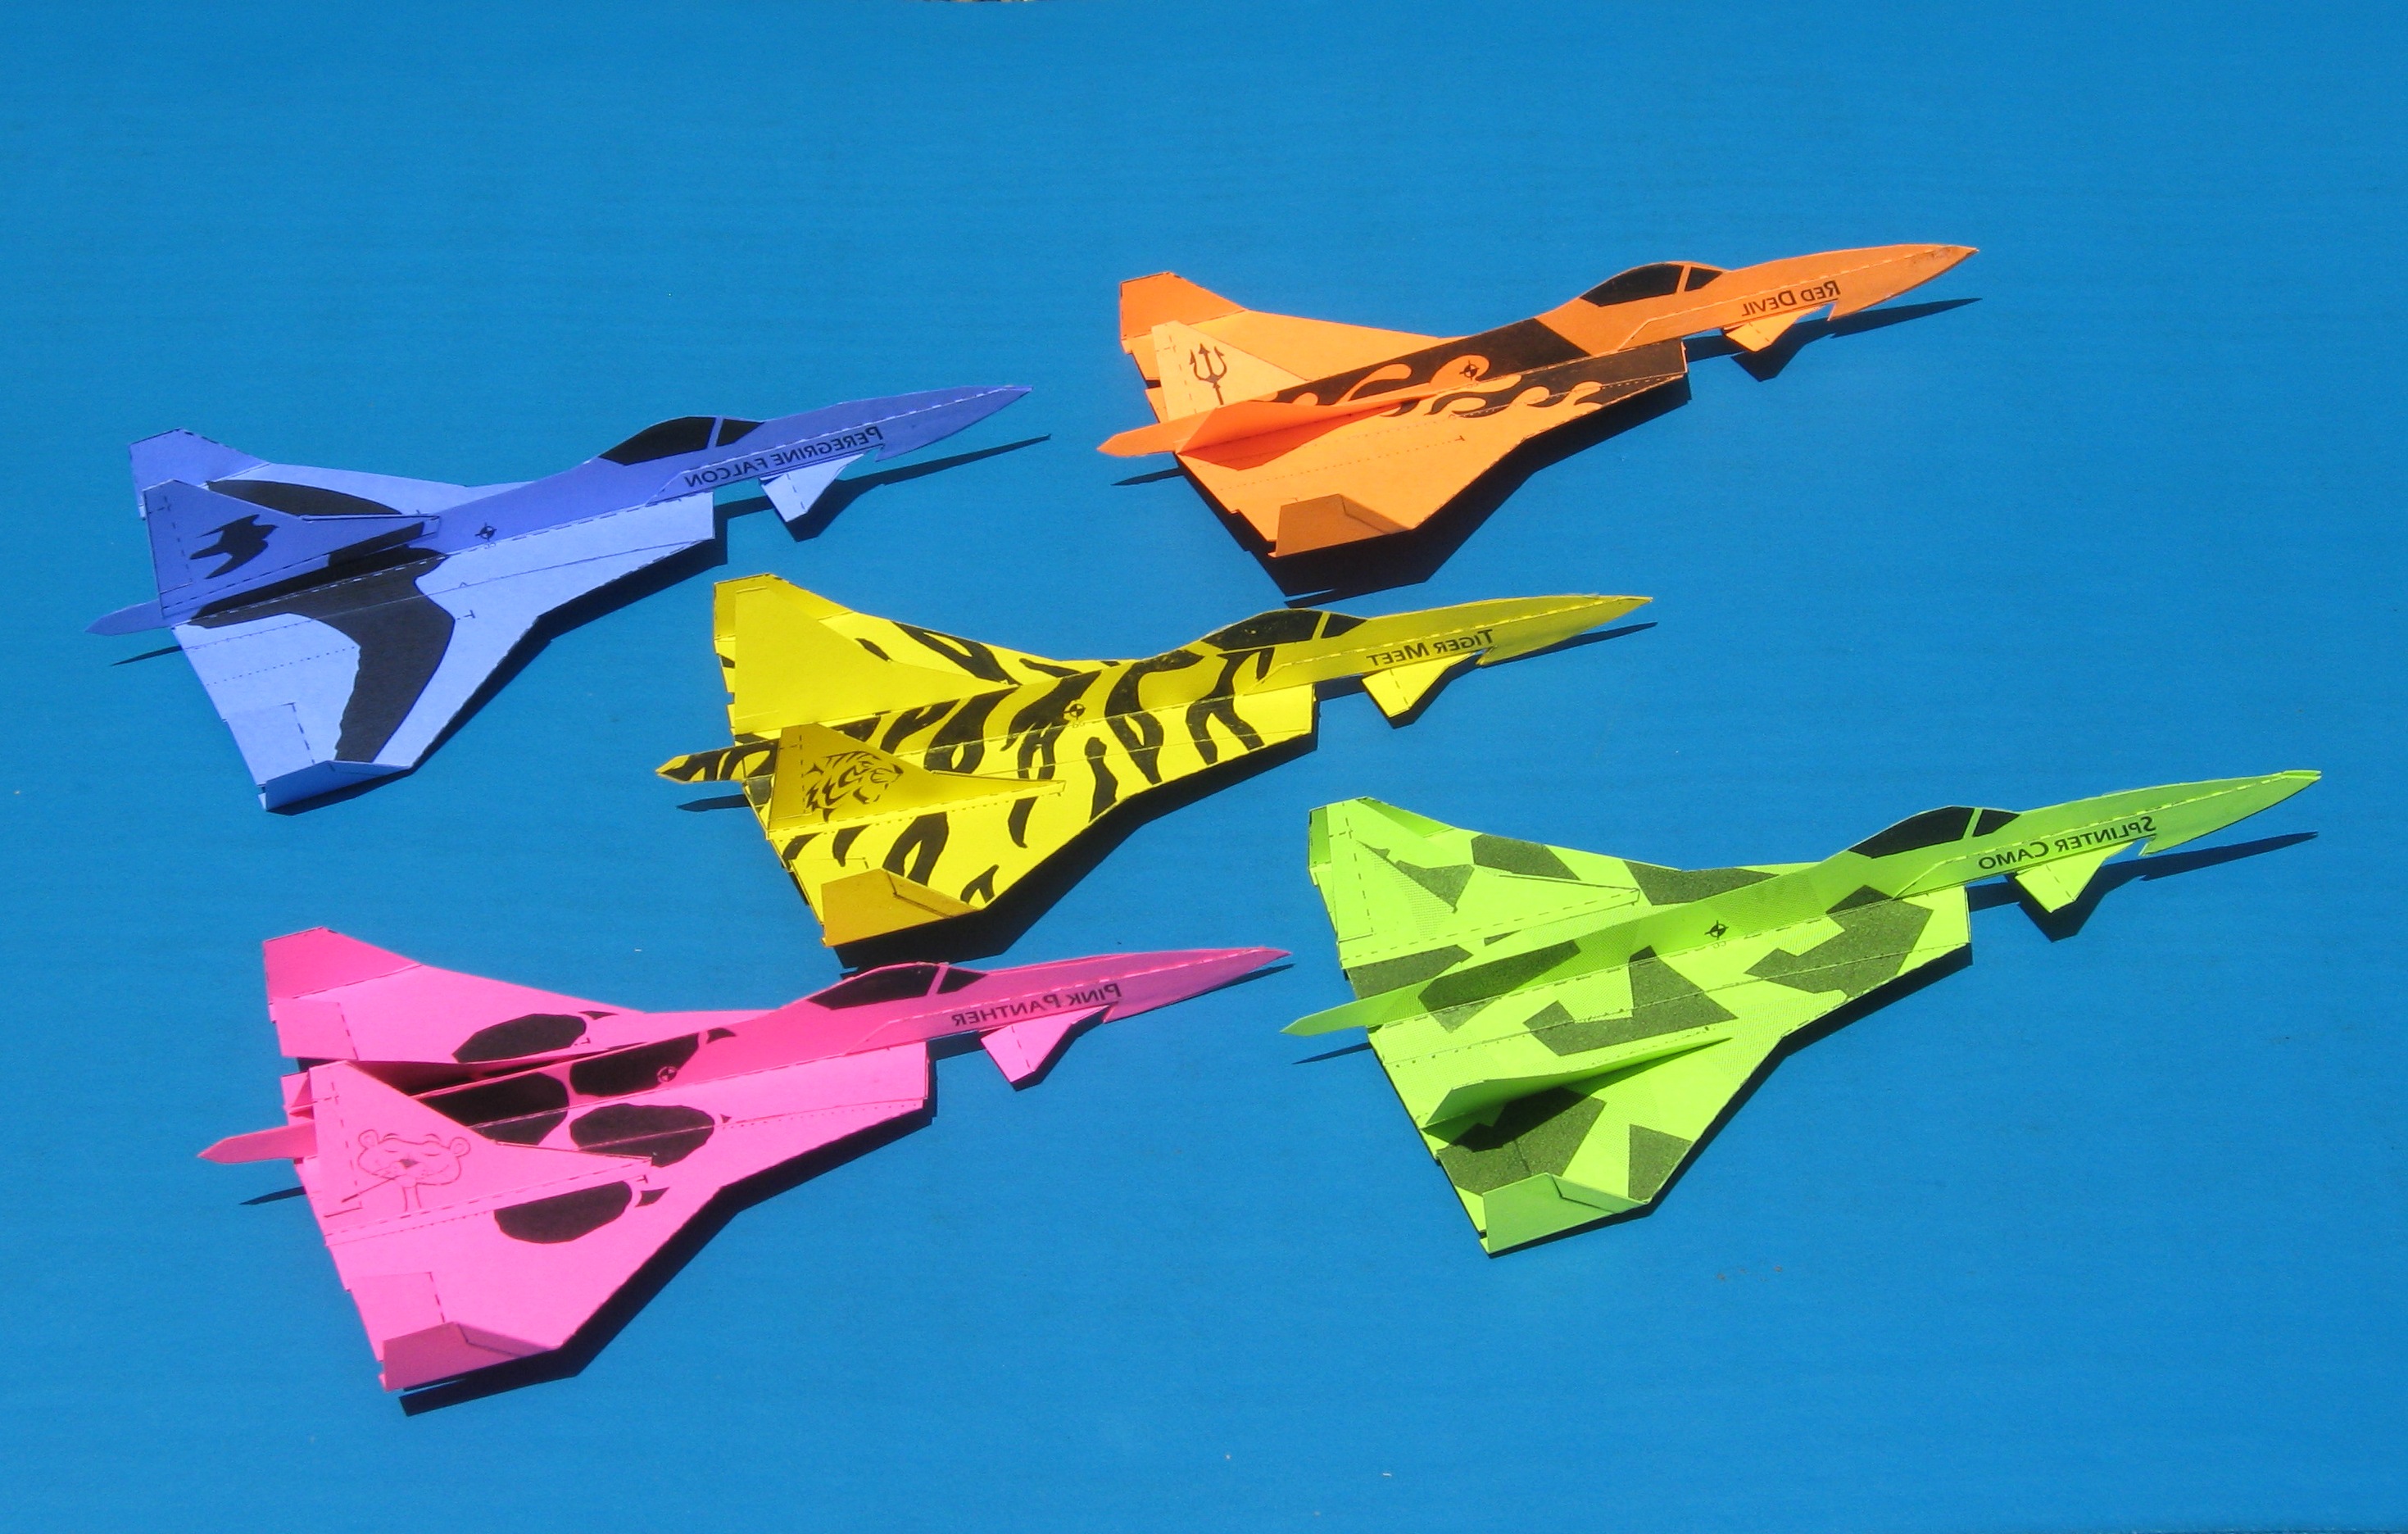
No doubt, jets are amazing — they are sophisticated, fast, sleek, and beautiful. One of the configurations that I like the most is the delta wing, so I included several features that I like from various fighter jets: the double delta of the Saab Draken, the fuselage profile of the McDonnell-Douglas F-15, the canard of the Eurofighter Typhoon, and the twin rudder of the MiG 29. Soon, I realized that the Speed Jet could be built in five different tail configurations using the exact same parts.

The fuselage is constructed with the laminated paper technique made popular by Yasuaki Ninomiya and others, but the design uses as few card stock layers as possible, because multiple laminations are heavy, labor intensive, and time consuming.

Here are the specs of the Speed Jet:

  • Type: F/F glider
  • Wingspan: 5″ (wingtips up)
  • Wing area: 16.16 sq. in.
  • Length: 9¼”
  • Weight: 0.20 oz
  • Wing loading: 0.33g/sq. in.

Project Steps

Gather materials and download template

Download the Speed Jet template here, and print it out on card stock.

Build the wing

The wing is the largest surface, so it was sensible to include a leading-edge reinforcement. This was not deemed necessary for the canard nor the vertical fin due to their small size.

Cut the outline and use a ballpoint pen to score along the broken line.

Glue the leading edge reinforcement under the wing. This should result in the wing curving slightly downward due to the moisture added by the glue, providing a natural camber, so don’t flatten the wing.

Let the glue dry. It is important to apply just small amounts of glue so the card stock doesn’t warp from getting too wet.

Score along the broken line on the trailing edge, but don’t cut or bend yet; you’ll do that once the plane is finished.

Fuselage and canard

The shapes of both the vertical fin and the canard are downsizings of the main wing profile.

Score and fold along the fuselage bottom broken line, folding back along the score (like butterfly wings). You’ll see the outline for only half of each piece with the broken line at the axis of symmetry. This cuts building time and, most importantly, ensures perfect symmetry.

Then cut out along the fuselage line, so you have a symmetrical body.

From that body, cut out the indicated sections — wing trailing edge, the section between the fuselage tab leading edge and the canard trailing edge, and the section in front of the canard — on the marked side only.

Fuselage and canard (cont'd)

Repeat on the other fuselage and glue together the uncut fuselage sides. I recommend clamping both sides of the fuselage between 2 plastic rulers to ensure a straight fuselage.

Let dry, then separate the canard flap section from the fuselage by cutting in between and score along the canard flap broken line.

Mount wing to fuselage

Add a thin line of glue to one side of the fuselage-to-wing tab, momentarily close both sides together and open again immediately; this will ensure both sides of the tab have just enough glue for gluing, but not so much that the wing would warp.

Place the fuselage on top of the wing (using the dotted lines as guide) making sure both leading edges match flush. Let dry.

Tail(s)

Cut out the vertical fin, leaving space for another “butterfly” with the middle line along the top of the fin. Score along the rudder’s broken line on both halves of the fin, but do not cut the moving part.

Now choose between 5 different tail configurations …

Classic Tail: plain vanilla

This is the easiest, cleanest, quickest, and best-known tail configuration. Don’t score and fold the bottom tabs; simply glue together both fin halves, and sandwich the top of the rear fuselage, using the fin’s broken bottom line as a guide. Place the fin flush with the wing’s trailing edge, keeping the finger grip (the protruding rear tip) clear. Resist the temptation to use only one half of the fin; this will throw off the center of gravity, making the plane nose heavy.

This configuration is the fastest, and the one with the most stable flight. This is because a single fin creates less drag than two, and makes the Jet more directionally stable, as side winds hit only one vertical surface instead of two. This forgiving configuration is the best for learning about the Speed Jet’s capabilities.

Twin Tail

Separate the fin halves at the top, and score along the bottom broken lines. Divide (cut) the tab into 4 smaller tabs, bending and gluing them alternately to the left and right to keep the fin at a right angle. Glue one fin along the guiding dotted line on each side of the wing.

In Twin Tail configuration, the 2 vertical fins will make the Jet horizontally stable, minimizing roll. However, it will have a weather vane effect, making your Speed Jet prone to turn into the wind; the stronger the wind, the more prevalent the effect. You may often see your Jet gently soaring (at the expense of speed and distance) into the wind.

Stealth Tail

Separate both fin halves at the top and score along the bottom broken line. Bend it as a single tab or separated, making sure to form one for the left and one for the right side. Glue one fin along the guiding dotted line on each side of the wing, with the tabs toward the center and the tips pointing out; this will keep the fin tips separated at about 8cm at the top.

The Stealth Tail configuration is a simple variation of the Twin Tail. Giving both rudders an outward inclination will eliminate much of the weather vane effect, allowing for more roll and directional independence during flight.

V-Tail

Separate both fin halves, and score along the bottom broken line. Divide (cut) the fin bottom tab into 4 smaller tabs, bending them alternately to the left and right. Glue one fin to each side of the rear fuselage-wing joint, and separate the fin tips about 4cm at the top.

Inspired by the F-117, this tail creates some turbulence due to the convergence of many corners between the horizontal wing, the vertical fuselage, and the inclined fins. This will have a certain destabilizing effect, which will result in occasional dives, recoveries, turns, or rolls during flight. If you prefer a more solid flight, you can easily convert the V-Tail to the Classic by gluing both fins together vertically and re-cutting the rudder in a higher position.

A-Tail

Keep the fin “butterfly” in one piece, score along the rudder bottom broken line, and bend it as a whole tab. Glue one fin along the guiding dotted line on each side of the wing, with the tabs toward the wing tips.

This is the most exotic tail configuration — and the most unstable. The “tent” space between the “A” and the wing creates a good deal of turbulence. This may be the reason why I have seen this tail configuration only in experimental, propeller driven planes.

Sometimes an A-Tailed Jet will spin, turn, and contort wildly at launch, but once dialed in, the tail-induced turbulence will make a real stunt flyer: It will stall, dive, recover, roll, turn, and do all sorts of crazy things in flight. Such crazy stunts are more frequent and intense under windy conditions.

If you can’t make your A-Tail Jet fly decently, or you’re just tired of it, you can convert it into a Twin Tail or a Stealth Tail by splitting apart the 2 fin tips.

Fuselage reinforcement

There are 2 butterfly-style fuselage reinforcements. Score, fold, and cut each piece. Glue the butterfly wings together and, once dried, glue one piece on each side of the fuselage, aligning them with the fuselage bottom and the nose cone tip. Clamp and let dry.

The fuselage reinforcements incorporate the catapult hook, and also provides the nose weight for balance. No paper clips or pennies needed!

Adjust the ailerons

The last thing to do is cut the aerodynamic control surfaces — the elevons and the rudder (the canard tabs were cut before, but do it now if you missed that step) — along the solid line and bend the wingtips 90° up. These winglets will tend to unbend, which is no big deal as long as you keep them more vertical than flat.

Like real jets, the Speed Jet will not fly if its elevon and canard configuration is 0 to 0. Start by bending the wing elevons 2mm up and the canard flaps 2mm down. In flight, this will lower the rear of the plane and lift the nose,

Use trial and error to find the best angle for the elevons and canards. It may change based on wind conditions; typically, stronger winds require smaller angles.

Adjust the balance

The Speed Jet is designed to be properly balanced for flying, but small variations may cause it to be tail heavy or nose heavy. Build a balance fork by vertically inserting 2 toothpicks in a cork, foam, eraser, or even a stiff piece of bread, and place your plane upside down on the toothpicks where the CG (center of gravity) mark is located.

If your glider is tail heavy, glue small pieces of card stock to the nose; if your glider is nose heavy, shave small amounts of paper from the nose. Go gradually, until the balance is correct. It’s better to be slightly nose heavy than slightly tail heavy.

Applying the rudder

Any abuse of rudder will send your Speed Jet corkscrewing to the ground. When needed, it must be bent just slightly.

The Classic Tail needs no explanation: the left rudder causes left yaw and vice-versa.

The trick with the double fins is to use only one rudder, which makes for cleaner airflow. Bend the left fin’s rudder to the left if you want to make a left turn, or right fin’s rudder to the right for a right turn. The only exception is the Stealth Tail configuration, for which you must bend the right fin’s rudder upward in order to produce a left turn, and vice-versa.

Launching

Any rubber band, about the length of the Speed Jet, will work. Use the rear end of the fuselage as a finger grip. I get the best control by holding the other end of the band between my thumb and my index finger.

Launch the Speed Jet at about 25° above horizontal, and at an angle three-quarters toward the wind, with the wings slightly tilted into the wind. This will make the Speed Jet turn and climb against the wind until it reaches its zenith, level off with a speed reserve, and then start the glide down.

A hand launch grip is provided as well. Just butterfly fold, cut, and glue it under the wing, centered and flush with the leading edge. This will make the Speed Jet slightly nose heavy, so compensate by increasing the upward tilt of the elevons.

For further safety and kid-friendly flying, you can fold and glue the nose tip backward. Don’t cut it away, for that would throw off the balance.

Conclusion

Troubleshooting


Whatever your flying trouble is, don’t worry. Up to now, not one single pilot has been killed flying the Speed Jet! However, here are hints that may be handy should your Speed Jet refuse to fly properly.

  • Nose Dive: Increase elevons up and canard flaps down angles, and/or diminish nose weight.
  • Porpoising: Diminish elevons and/or canard flap angles, and/or add nose weight.
  • Dead Leaf: Add nose weight; check for not having a zero-zero configuration.
  • Corkscrewing to the Right: More left elevon up and right canard flap down. You may need to compensate with less right elevon up and less left canard down.
  • Corkscrewing to the Left: Vice-versa.
  • Sharp Turn to the Right: Do as for corkscrewing, but not as much, and combine with a tiny bit of left rudder.
  • Sharp Turn to the Left: Vice-versa.
  • Nothing Works: Build another Speed Jet.
  • Everything Works: Build another Speed Jet!
Again, you can download the Speed Jet template and print it out. You can also obtain the colored template hardcopies directly from me at german_tapia@hotmail.com, Subject: Speed Jet.

Last, but not least, I want to thank my friends Maureen, Mardi, Jeff, and Max for their support and encouragement with this project.