


Fashion is taking a cue from traditional crafts this season, with a plethora of layered folk-inspired necklaces in myriad eye-popping shades making an appearance on Spring/Summer 2013 runways. And everyone seems to love a tassel right now, from Matthew Williamson and Isabel Marant to Saint Laurent. With minimal supplies and a bit of patience, you too can create your very own bespoke piece.
Supplies
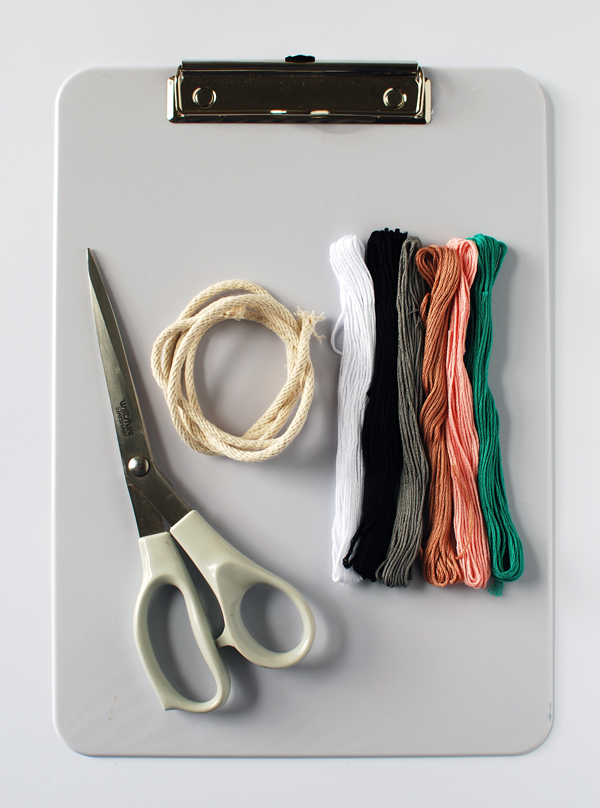
- 1 metre (39 inches) cotton cord.
- Embroidery floss in various colours.
- Scissors.
- Clipboard.
- Scrap of thick cardboard.
1. Start Winding The Floss
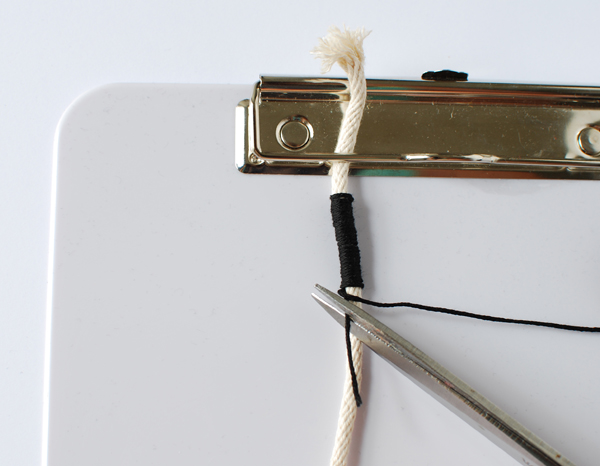
Step 1
Secure one end of the cord to the clip board.
Tie the floss into the cord with a single knot, about 4cm (one and half inches) from the end of the cord.
Lay the tail of the floss along the cord and hold it in place.

Step 2
Start winding the embroidery floss around the cord and the tail, making sure that the floss is wound firmly and there is no cord showing through between the wraps.

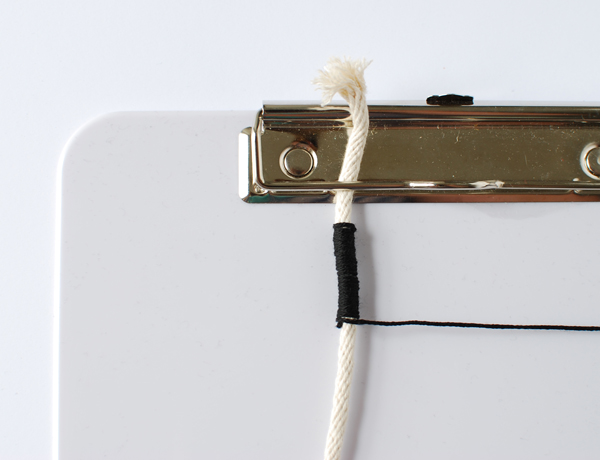
Step 3
When you've wound down a couple of centimetres (about half an inch to an inch), cut the tail off.
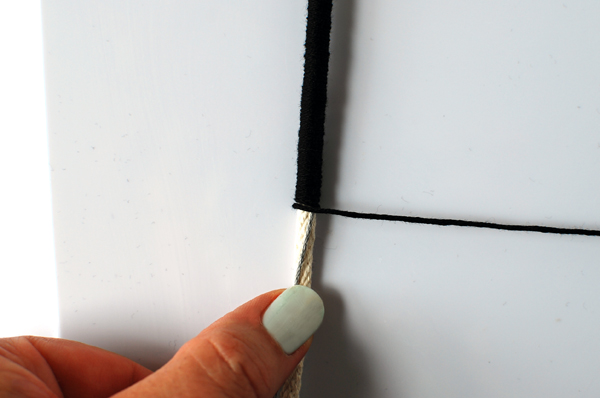
2. Add the Next Colour
Step 1
Add the next colour when you're about two to three centimetres (an inch) away from where it will begin.
Lay the new colour along the cord.

Step 2
Continue to wrap the first colour over the new colour so the end is secured underneath.
Step 3
To finish the first colour, you need to create a loop by taking the floss behind the cord then bringing the end of the thread back through the loop.

Pull the knot tight to secure it.
Step 4
Lay the tail of the first colour along the cord and hold it in place.
Making a loop with the second colour, wrap the floss around the back of the cord and pass it through the loop. Pull the knot tight.
3. Alternate Colours
Step 1
To alternate colours in quick succession - like I have with the grey and coral - you need to have both colours in play at the same time.
Add the coral at the same time you start winding the grey.

Step 2
When you've wound the grey, swap it for the coral. Instead of cutting the grey off, continue winding the coral over it, then swap them again when you're ready.

Step 3
Continue to add colours - winding each one onto the cord at random intervals.

4. Finishing off
Step 1
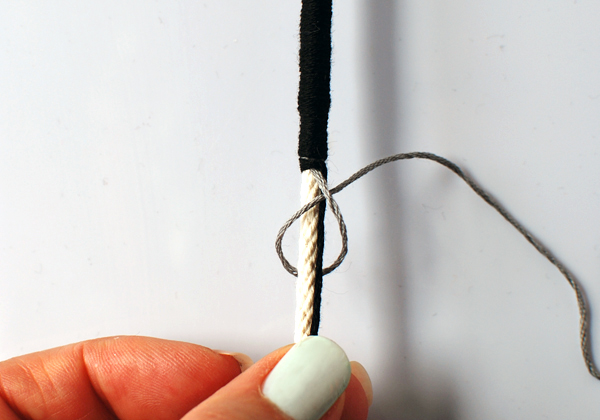
Continue winding until you are about 4cm (one and half inches) from the end of the cord. Tie the floss around the cord using the loop as demonstrated in Step 2. Run the end of the floss along the cord towards the end of the cord.
Step 2
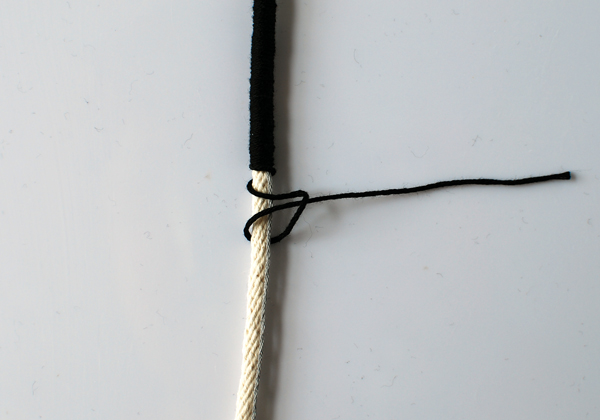
Tie a knot in the end of the cord, and include the tail of the floss in the knot.
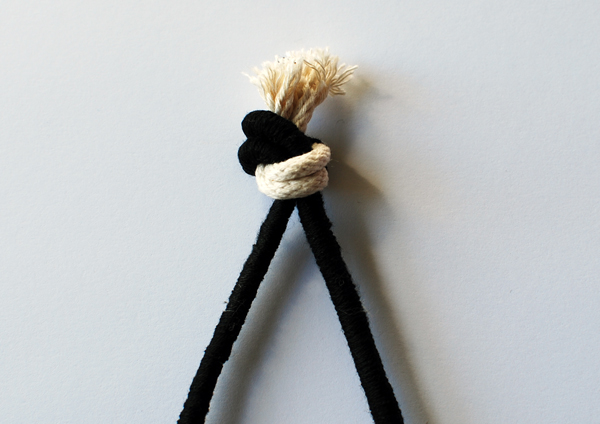
5. Add a Tassel
Step 1
Cut a scrap piece of cardboard to about 10cm (4 inches).
Wind some floss around the cardboard about thirty times.
Cut another piece of floss about 12cm (5 inches) long and run it under the wound floss at the top of the cardboard.

Step 2
Tie it in a tight double knot.
Cut the floss and carefully slip it off the cardboard.

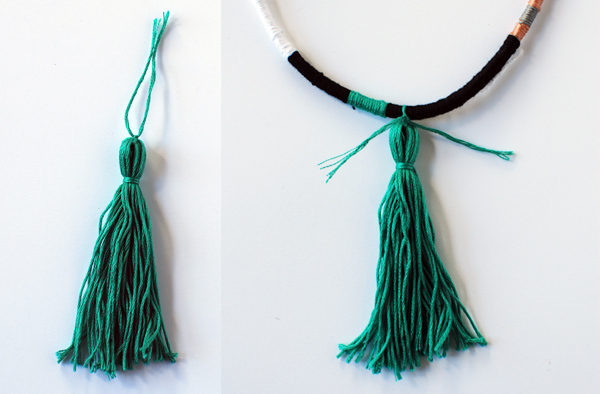
Step 3
Cut another piece of floss about 30cm (12 inches) long and wind it around the tassel four or five times and tie it in a double knot. Tuck the tails into the tassel.
Step 4
Using the top piece of floss, tie the tassel onto the necklace. Tie it so that the knot sits under the necklace and on top of the tassel, so it will be hidden. Tuck the tails into the centre opening of the tassel and trim them off.
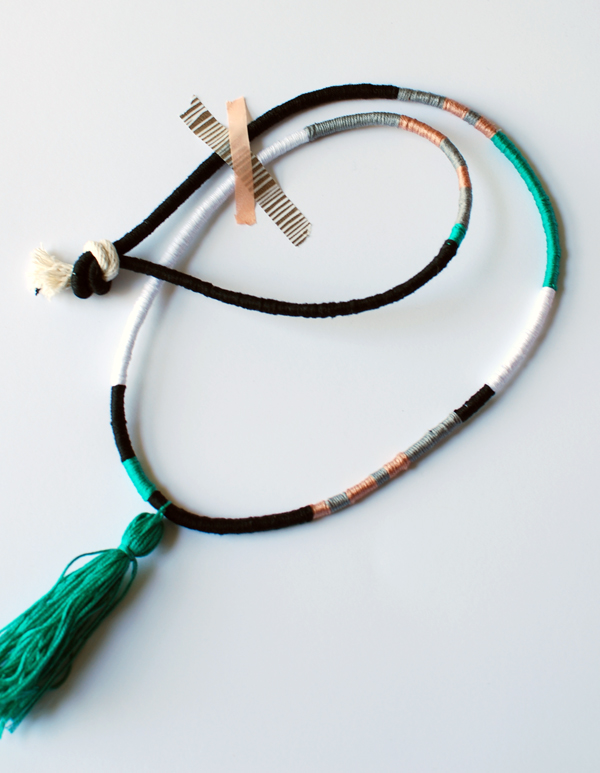
Wear Your Necklace
And you're finished. Well done!
In this tutorial, we've shown you a very simple technique of hand-wrapping a length of cotton cord with complementary shades of embroidery floss.
All that winding can get a tad repetitive, but look at the result: your own bespoke necklace! Why not make a couple more necklaces in different colours, and wear them layered around your neck? You can also make shorter versions for bracelets, with a number of tassels attached at regular intervals.
Do you like making your own jewellery? How did you find this tutorial? Let us know in the comments section below - we'd love to hear from you.


